Setup Guide
Install & Configure
Setup guide for MotionBuilder Live Sync For Unity, covering installation and receiver configuration.
The trial edition supports up to 1 character and 2 props. For more, the Unlimited edition is required.
Install MotionBuilder Pluginlink
- Download the plugin from theDownload page.
- Quit MotionBuilder if it is running.
- Unzip the downloaded file.
- Copy the plugin (MoBuLiveSyncTool.dll) that matches your MotionBuilder version to the plugin folder.
Example for MotionBuilder 2023: copy 2023\MoBuLiveSyncTool.dll to C:\Program Files\Autodesk\MotionBuilder 2023\bin\x64\plugins.
Import MotionBuilder Pluginlink
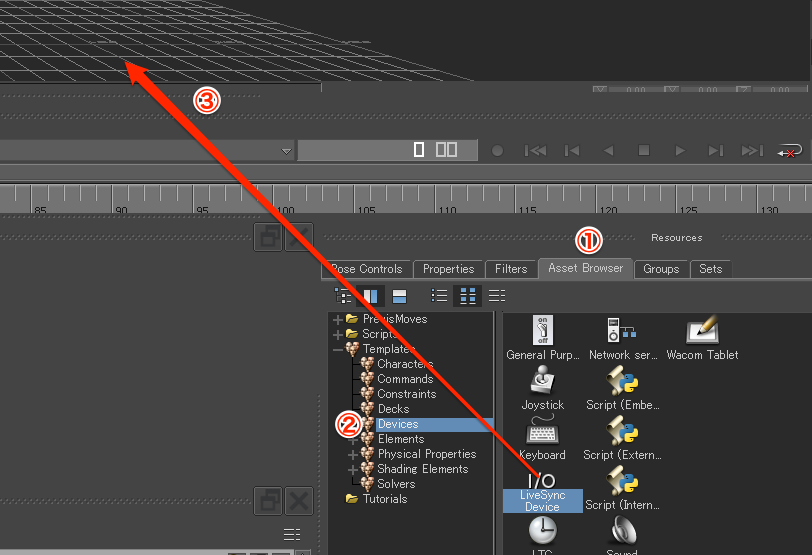
- Open the Asset Browser tab in the Resources window.
- Click Templates > Devices.
- Drag "LiveSyncDevice" into the scene.
- Check Navigator > Devices to confirm the import.
Install the Unity Receiverlink
Install the Unity receiver library from theDownload page or from GitHub .
1. Install via Unity Package Manager
Add the URL from the GitHub README to Package Manager.
https://github.com/nasshu2916/MotionBuilder-Live-Sync-Unity.git?path=/Assets/MoBuLiveSync
2. Install manually
Clone the repository and add Assets/MoBuLiveSync to your Unity project.
MotionBuilder Plugin Setuplink
Characters Tab
Configure the characters you want to sync.
Characters must have matching bone rotation offsets between MotionBuilder and Unity. It is recommended to use FBX exported from Unity's FBX Exporter in MotionBuilder.
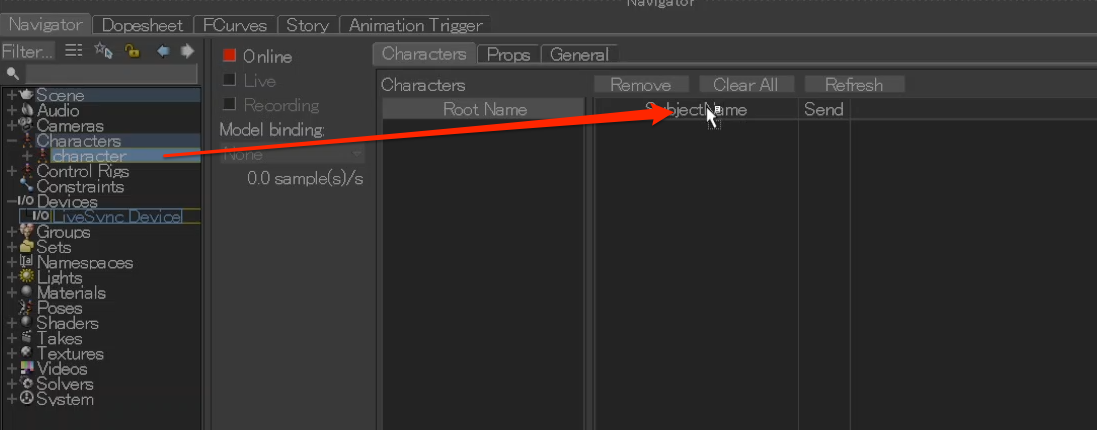
Add a Character
Drag a characterized Character from Navigator > Characters onto the table header to add it.
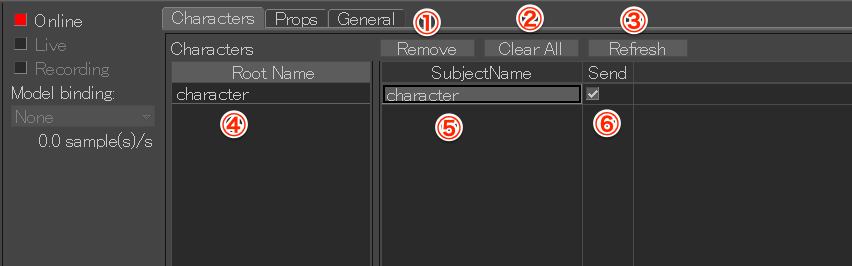
- "Remove" deletes the selected character.
- "Clear All" removes all characters.
- "Refresh" updates the list and adds all characterized characters.
- "Root Name" shows the character name.
- "Subject Name" is the identifier used in Unity. It can be edited by double-click.
- "Send" toggles data transmission.
Subject Name must be unique on the Unity side. Duplicates between Characters and Props are allowed.
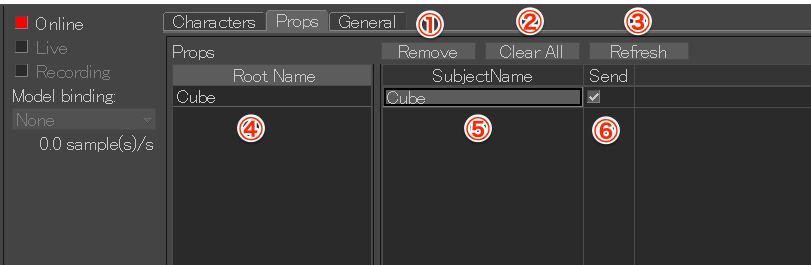
Props Tab
Configure the props you want to sync.
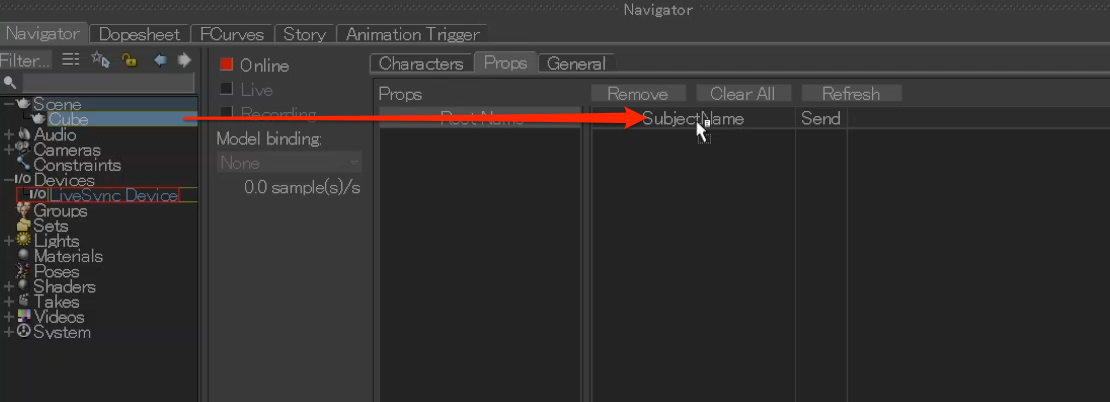
Add a Prop
Drag a scene node from Navigator > Scene onto the table header.
- "Remove" deletes the selected prop.
- "Clear All" removes all props.
- "Refresh" updates the list.
- "Root Name" shows the prop name.
- "Subject Name" is the identifier used in Unity.
- "Send" toggles data transmission.
Subject Name must be unique on the Unity side. Duplicates between Characters and Props are allowed.
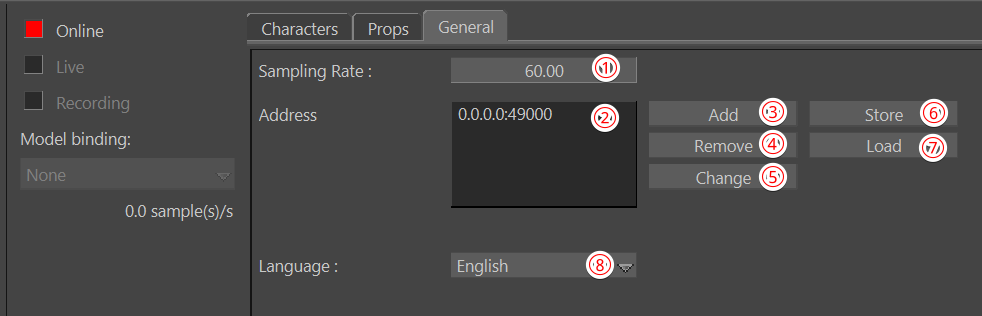
General Tab
Configure global settings.
- "Sample Rate" sets the sampling rate (default 60).
- "Address" shows the destination IP address and port.
- "Add" adds a destination. ※ Enter IP address and port in the format [IP address:port].
- "Remove" deletes the selected destination.
- "Change" edits the selected destination.
- "Store" saves the destination list to the PC.
- "Load" loads a saved destination list.
- The language can be switched from the dropdown.
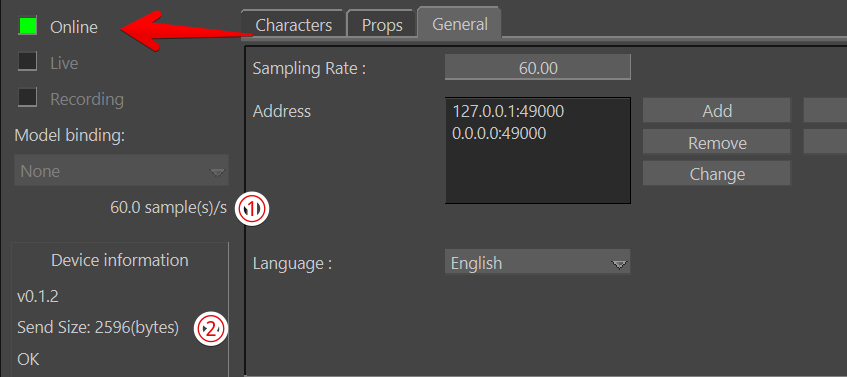
Start / Stop Synclink
Press "Online" to start or stop syncing. A green button indicates active transmission.
① shows packet rate, ② shows packet size.
Additional Featureslink
Save / Load in FBX
Include the device in FBX to save and load the following settings:
- Characters settings
- Props settings
- Destination address settings
Unity Setuplink
Add Receiver
- Add the MoBuLiveSyncReceiver.prefab from Asset/MoBuLiveSync/Prefabs to the Scene, or add MoBuLiveSyncManager.cs to a GameObject.
- Set the receive port (default: 49000) in the Inspector.
- Toggle "Is Enable Receiver" to enable/disable receiving.
While playing, the Inspector shows packet size, sampling rate, and subject names.

Character Setup
Add LiveSyncCharacter.cs or use MBSync > Add Sync Character.

Configure the following in the Inspector.
- Assign the Receiver to Live Sync Manager.
- Set Subject Name to match MotionBuilder.
- Toggle Is Enable Sync.
- Assign the Animator.
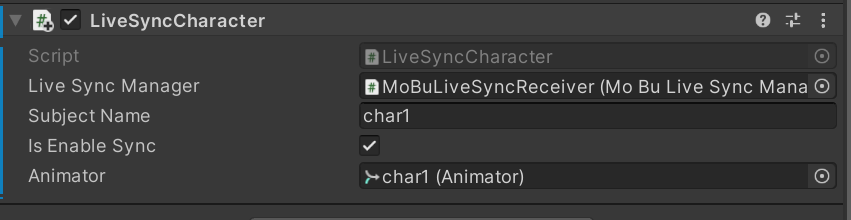
Using the menu auto-fills some fields.
Characters must use Humanoid animation type and matching mapping.
Prop Setup
Add LiveSyncProp.cs or use MBSync > Add Sync Prop.
- Assign the Receiver to Live Sync Manager.
- Set Subject Name to match MotionBuilder.
- Toggle Is Enable Sync.
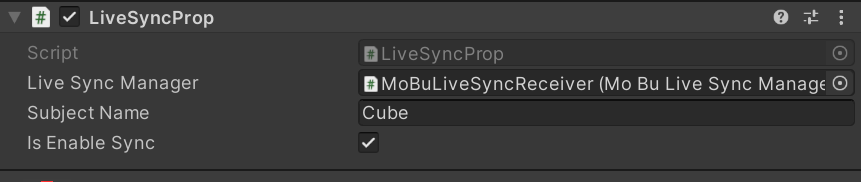
Using the menu auto-fills some fields.